The Google Index API, also known as the indexing API, allows you to quickly inform Google about changes on your site, such as URL removals and URL updates. Thanks to the rapid information flow provided by the indexing API, Google scans the pages in question and presents them to users in their most recent form. This way, you can gain a speed advantage in your SEO efforts.
What you can do using the Google indexing API includes:
- Submitting newly published URLs,
- Informing about URL updates,
- Informing about URL removal operations,
- Providing request checks,
- Sending bulk index requests.
For more information, I recommend reviewing the guide available on the Google blog.
https://developers.google.com/search/apis/indexing-api/v3/quickstart
Bu Yazıda Nelerden Bahsedeceğiz?
ToggleWhy Should the Google Index API Be Used?
- Your page updates are indexed faster,
- By acting quickly on new and current topics, you can increase your chances of ranking,
- Staying up-to-date makes it easier to maintain your positions,
- Of course, all these operations can be done within a certain quota.
Google Index API Usage Quotas
There are certain quotas to be aware of when using the Google Index API services. These quotas determine the number of indexing requests that can be made within a day.
The Google Index API quotas are as follows:
| Submission Type | Quota |
|---|---|
| Publish/Update | 200 per day |
| Data Request | 180 per minute |
| Project Based | 600 per minute |
How to Use the Google Index API?
To set up the Google Indexing API, you need to have a Google Cloud account.
After opening a Google Cloud account, go to the Google API console. From there, you need to create a new project. Create your project.
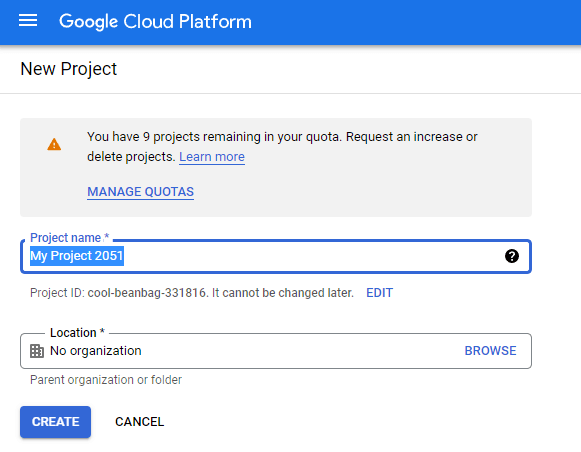
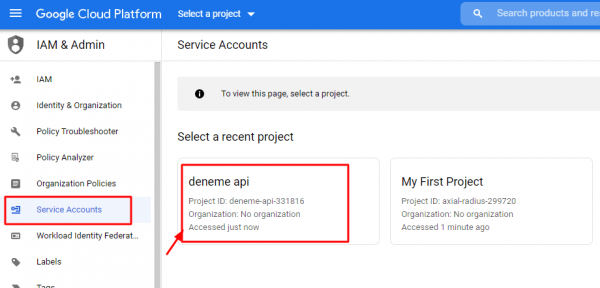
After creating your project, you will need to create your service account. For this, first click on the “Service Accounts” text located in the left management panel. Then, select the project you have just created.
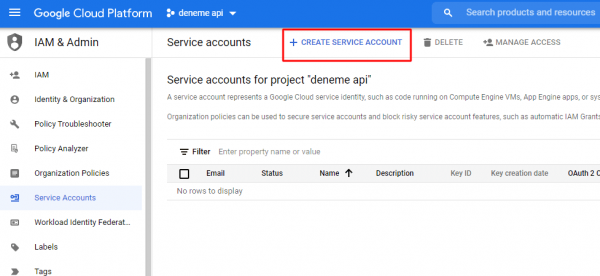
After selecting your project, click on the “Create Service Account” area and create a new service account for yourself. We are required to open these service accounts to create the Google Quick Index API.
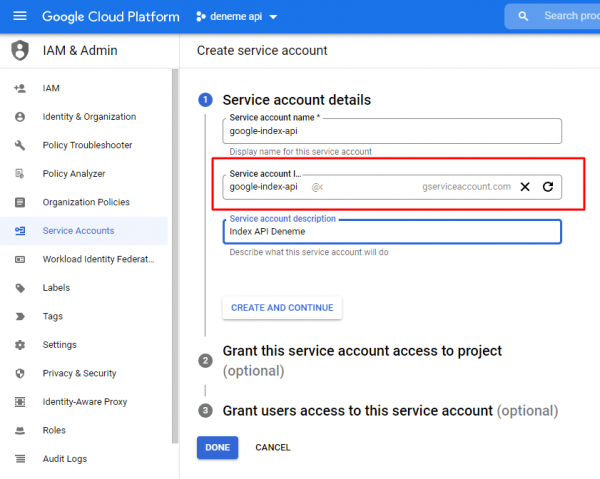
After opening your service account, you will be asked to enter some information. Please complete these details. After filling in this account information, the output given in the “Service Account ID” field is very important for you. Please copy this.
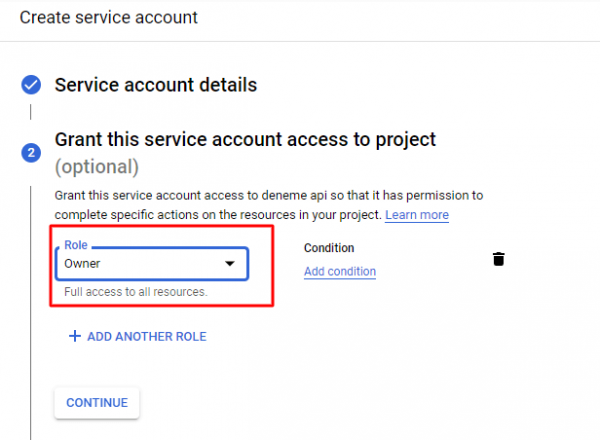
In the Google Index API service account creation section, you will encounter the “Role” field. Edit this as “Owner.” This is a very important detail. Make sure you definitively set it to “Owner.”
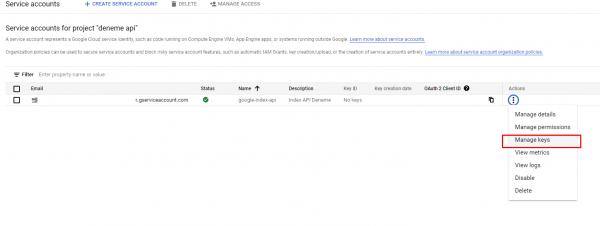
After completing your account information, it’s time to create a key. For this, click on “Service Accounts” in the left menu, then find the service account you just created and click on the three dots next to it. Press the “Manage keys” button that appears.
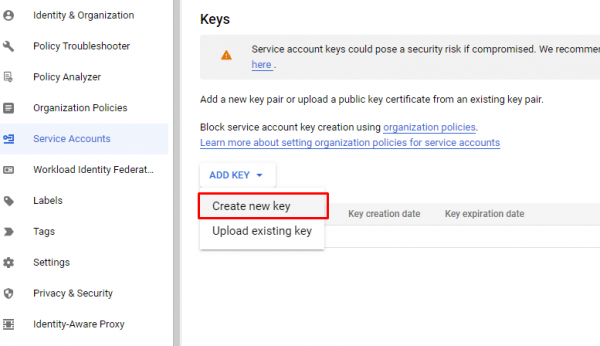
Once in the key management area, we will generate a new API key. First, click the “Add key” button and then click on the “Create new key” option.
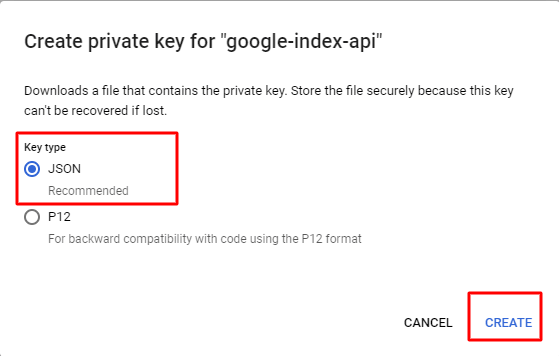
After clicking the create key option, a field with two options will appear. You should choose the JSON option from this field. After selecting the JSON option and clicking the “Create” button, the JSON file containing the API key will automatically download to your computer.
After obtaining our API key, we will enter our Google Search Console panel and set up the service account we created as an owner of our property. First, open the Search Console. Then, press the “Settings” button located in the left management panel.
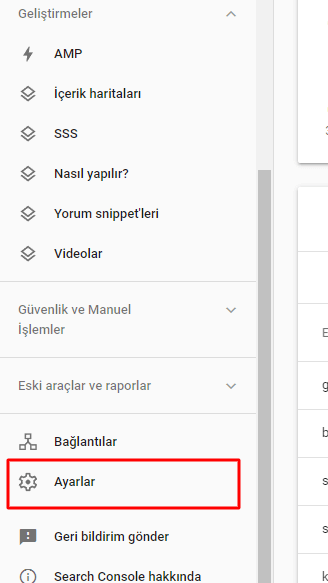
After entering the settings, we will need to manage user permissions. For this, open the “Users and Permissions” area.

Find your active ownership and press the “Manage property owners” button from the options.

After entering the property ownership settings area, click on the “Add owner” section at the very bottom left. From here, we will connect our Google Cloud project.
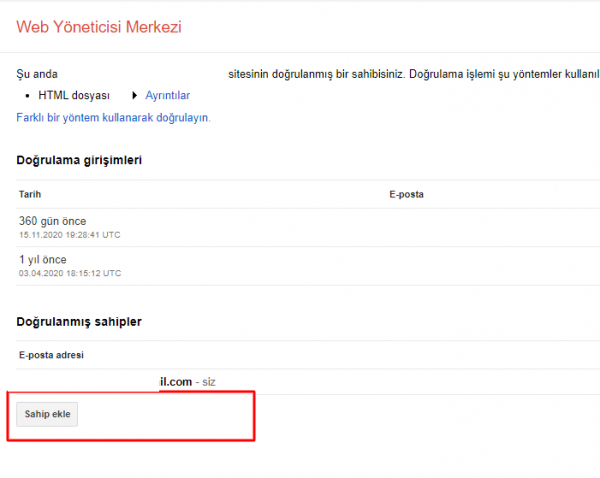
After reaching the add owner area, what you need to do is to paste the “Service Accounts ID” you received during project creation here. If you forgot to copy it, reopen Google Cloud Platform and go to the “Service Accounts” section. The Account you created will appear there. Copy the ID appearing as the Account’s email address.
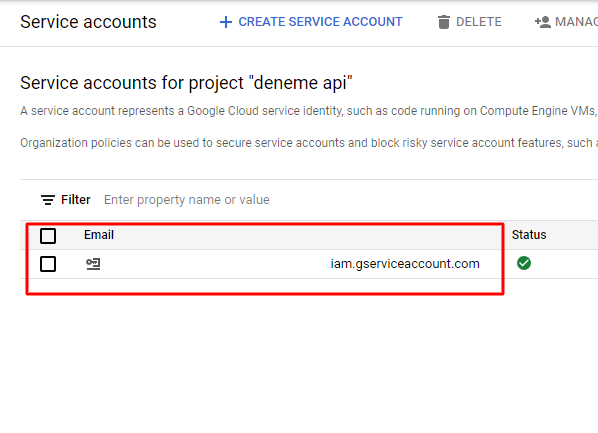
After copying your Service Account ID, return to the Google Console ownership area and paste the copied ID into the email field requested in the add owner section.

After adding the ID, press the “Continue” button and complete the addition process. This way, you will have successfully linked your project to your Console account.

With all these steps, you will have completed the Index API setup and connected your project to Google Console. You can use the JSON file in your system to send data, thus taking advantage of the quick index API feature.
Setting Up Google Quick Index API for WordPress Sites
After completing the steps mentioned above, if you have WordPress sites, I will explain how you can benefit from quick indexing. For this, certain plugin installations are required. I recommend the Rank Math SEO plugin and the Instant Indexing for Google plugin, which I also refer to in my article. To quickly index with WordPress Google Indexing API, first download and install these two plugins.
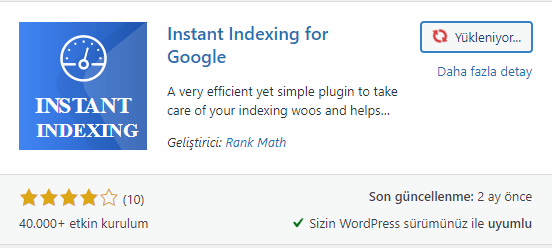
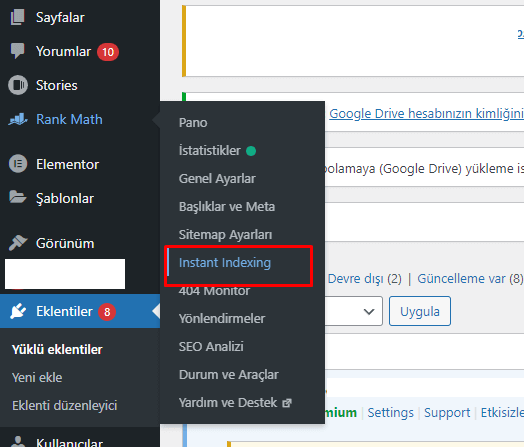
After installing the WordPress plugins, go to the “Rank Math” settings in your admin panel and click on the “Instant Indexing” option from the opened area.
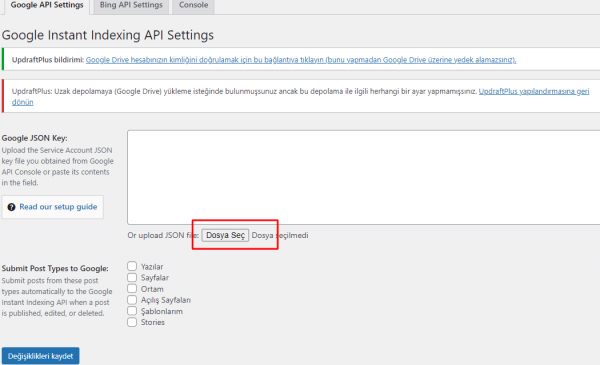
From the settings section that appears, open the “Google Indexing API settings” area and upload the Google Index API JSON file you downloaded to your computer to the plugin. When doing this, don’t forget to select the Post type as either “Posts” or “Pages”.
After uploading the JSON file, you are now ready to use the quick indexing API. To do this, go to the “Console” area on the plugin. Enter the URLs you want to inform the Google bots about and thereby submit to the API in the area that appears here. Then, select the query you want to be executed. These options include new URL submissions or updates, URL removal requests, and URL status checks. After selecting these, press the “Send to API” button.
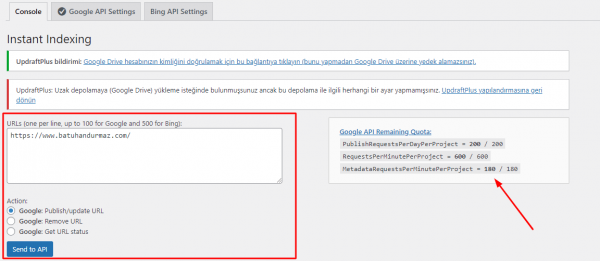
And just like that, your quick indexing operations are complete! Congratulations.

You can still check all your submissions and examine the metrics through the project settings (Google Cloud).

Is There a Quota for the Google Index API?
There is a usage quota for the indexing API provided by Google. According to the information given in the guide, you can send up to 100 URLs at a time for bulk index requests.
Is There No Need to Use a Sitemap After Setting Up the Index API?
After setting up the Index API, Google recommends continuing to use your site map. While the use of the Index API is recommended for submitting URLs, it’s important not to forgo submitting a sitemap because it covers the entire site.
Does the Google Index API Really Provide Quick Indexing?
According to Google and other user data, the Indexing API significantly aids in achieving quick indexing.